Arts & Crafts & Algorithms (pt.2)
Continued exploration of camera tracking workflows for guiding AI outputs
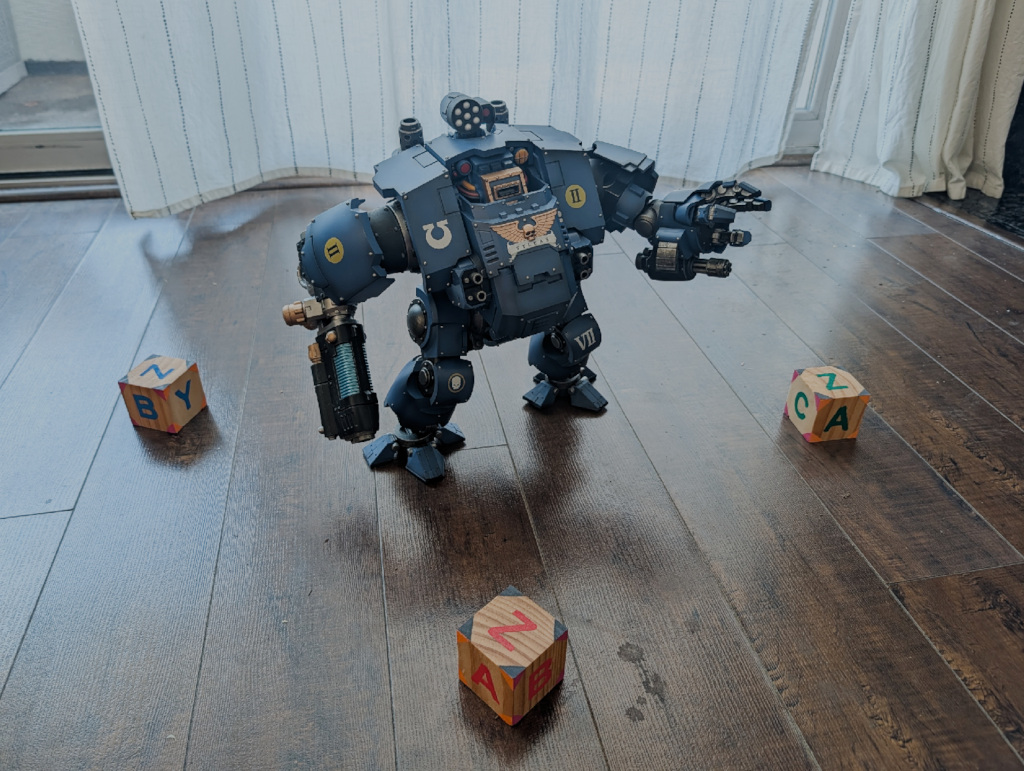
While the Blender plugin is able to use the wood blocks in the photographs (or technically any box-shaped object as long as I know the exact dimensions) to “walk backwards” and generate a 3D scene, the unfortunate truth was that manually tracking the cubes (ie. identifying their corners/edges for the solver) was more time-consuming than I’d like.
So, to help the "robot" (computer vision model) identify the cubes on its own, or at least that’s the hope, I did the following:
- Painted RED, GREEN, and BLUE letters in a consistent manner on each of the three cubes.
- Painted the corners of each face in contrasting colors to make it easier to identify edges.
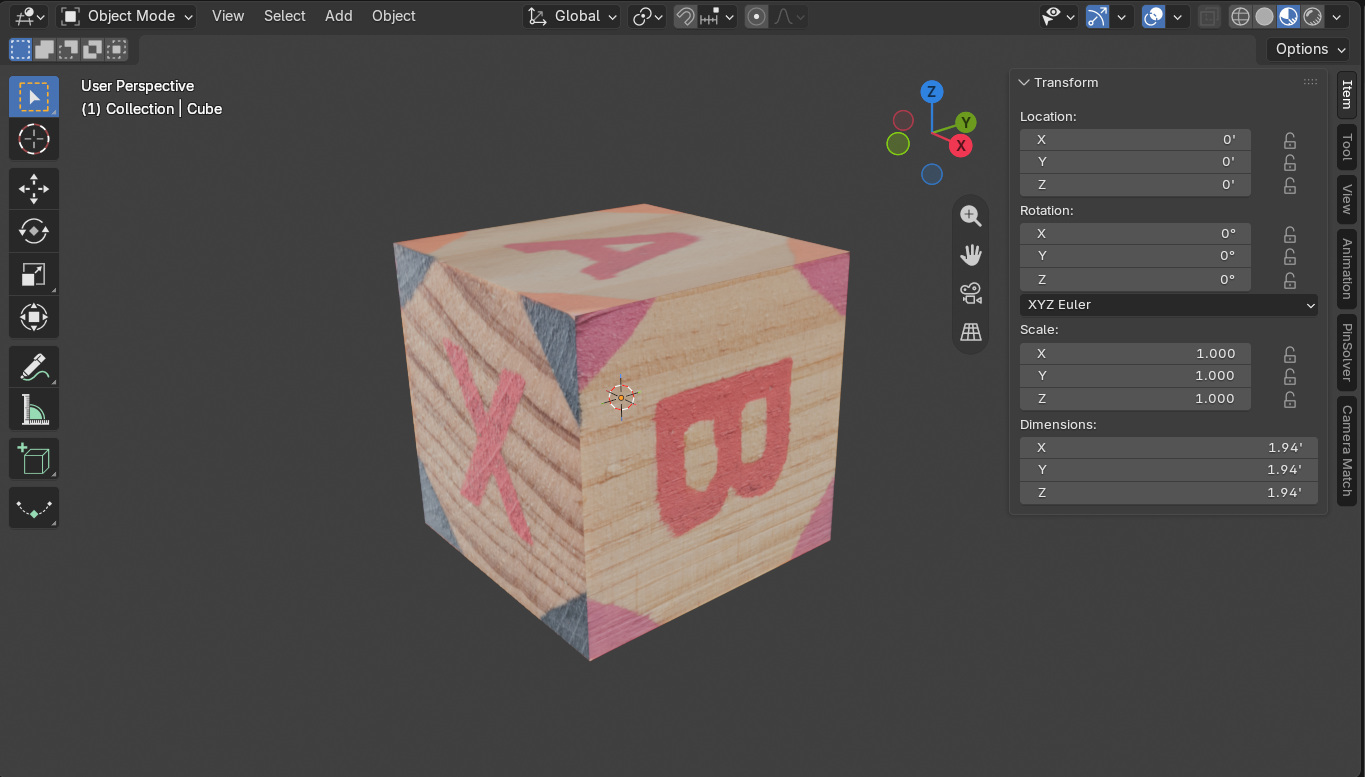
- Created accurate 3D proxy versions of the blocks to give the plugin a better idea of what the real-world wood blocks actually look like.
That last one didn’t quite turn out as expected, but it was an important stepping stone towards figuring out the workflow I ultimately ended up with. Plus, it brings up some interesting possibilities that might be worth exploring in v2 of the tool.
A Successful Failure
When I started building the plugin, my plan was to employ a vision-capable LLM, like Gemma or Qwen, to “read” the wood blocks in the photograph and automatically set the tracks. That was the spec I initially drafted while planning out the work and setting up my dev environment, and it was the path I pursued. However, as development progressed, it soon became clear that using a full LLM, even a smaller variant, was (a) overkill for my needs, and (b) would require actual model fine-tuning to get any useful results.
I didn’t necessarily mind the overkill—if you’re going to engineer something, you might as well over-engineer to (hopefully) solve the problems you haven’t yet run into—but proper LLM training was beyond the scope of this particular project. Learning to fine-tune a model is very much on my to-do list, but it isn't a trivial undertaking, and I didn’t want it to derail this particular project.
In the end I went with good ol’ OpenCV for the solver. It didn’t get me the “1-click” solve I was after, but it got me ~90% of the way to a usable track: the tracks (I used seven per wood block) are auto-generated by the tool and placed in the general vicinity of where they’re supposed to go, and instead of spending minutes manually adding the tracks myself, I now spend a few seconds per cube adjusting them. That’s an acceptable v1 compromise in my book.
Bringing It All Together
With the camera track complete I’m then able to create the 3D scene, which thankfully is a single-click process, and start building out the shot. The star of this particular shot was the W40K dreadnought model which is right smack in between the three blocks. So using the 3D proxies of the woodblocks to orient myself in 3D space I began adding assets to the shot—specifically, two tanks flanking the mech.
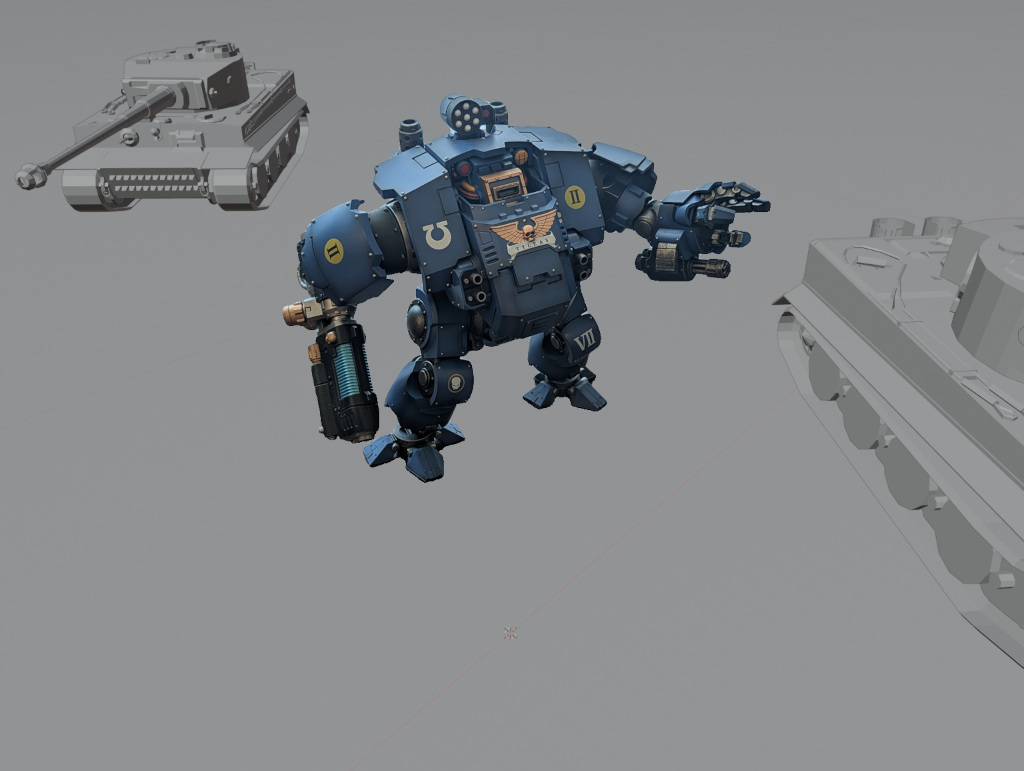
Once I was happy with how the shot looked, the next step was to generate a depth map of the scene in ComfyUI. This would act as the initial blueprint for the AI image generation as I began “filling in” details: adding a damaged street environment, adding texture to the dreadnought and tanks, normalizing the lighting across all assets so everything felt properly grounded, etc.

With the initial comp complete, I next moved into the sweetening phase: adding debris, smoke, explosions, and other small details to transform the shot into a proper battlefield. Once I had something that felt like a properly chaotic but still readable composition that told a story (“war is hell!”), I used that image as the first frame in my video generation, also via ComfyUI.
Below is an abbreviated visual breakdown of the general workflow:
At this point, I have a POC workflow that allows for mixing AI-enhanced real-world assets with CG elements and using the resulting composition to guide (art direct) further AI image and video generations.
There is still plenty of room for improvement, from experimenting with different ControlNets besides the depth map to integrating a vision-capable LLM, as previously mentioned. But before moving on to v2, I want to explore incorporating even more real-world assets into the shot and perhaps attempt a multi-level shot, since my tests have currently been limited to a single flat plane.
Stay tuned!